OGC Hackathon 2019 Report
Few weeks before attending the OGC Hackathon held in London from June 20 to 21, I tried to implement a new version of the ZOO-Kernel on a server to see if having such a wps-rest-binding support or the "OGC API - Processes" would be feasible.
A first output of this work can be found here. This swagger interface is simply connecting the API defined by the ZOO-Kernel at this address and create the interface depending on the API definition.
Note that looking at the high numbers of services on the first instance where I have setup the ZOO-Kernel, I have also published another instance with less services available here. In this version only some raster-tools and vector-tools services coming from ZOO-Project and MapMint services. It also includes the OTB support, still this one require to be run asynchronously, which is traditionaly the case when you are using OTB anyway.
Testing using ogr/base-vect-ops
When starting implenting this new wps-rest-binding support I mainly used the hello world sample in the various languages. But then, I realize that presenting the ogr/base-vect-ops would be a good set of services to test first. Also, I noticed that pygeoapi got an online demonstration server where we can get access to "OGC API - Features" implementation so I decided to try testing the services with this data as input for the processing.
You can find below every step to run the existing OGR base vector operations by using the wps-rest-api.
- Load the swagger interface from here.
- Search for Execute EndPoint and click on the green line below (showing "/processes/{id}/jobs").
- Press the "Try it out" button to display the interface to run an Execute request.
- Set: "vector-tools.BufferPy" in the process id field then, in the "Request body" part, please enter the following content:
{
    "inputs": [
	{
	    "id": "InputPolygon",
	    "input": {
		"format": {
		    "mimeType": "application/json"
		},
		"value": {
		    "href": "https://demo.pygeoapi.io/master/collections/utah_city_locations/items?f=json"
		}
	    }
	},
	{
	    "id": "BufferDistance",
	    "input": {
                "dataType": {
		    "name": "double"
                },
		"value": 0.05
	    }
	}
    ],
    "outputs": [
	{
	    "id": "Result",
	    "format": {
		"mimeType": "application/json"
	    },
	    "transmissionMode": "reference"
	}
    ]
}
- In case you want to get directly the json object containing the result directly within the answer you may use the following for "Request Body":
{
    "inputs": [
	{
	    "id": "InputPolygon",
	    "input": {
		"format": {
		    "mimeType": "application/json"
		},
		"value": {
		    "href": "https://demo.pygeoapi.io/master/collections/utah_city_locations/items?f=json"
		}
	    }
	},
	{
	    "id": "BufferDistance",
	    "input": {
                "dataType": {
		    "name": "double"
                },
		"value": 0.05
	    }
	}
    ],
    "outputs": [
	{
	    "id": "Result",
	    "format": {
		"mimeType": "application/json"
	    },
	    "transmissionMode": "value"
	}
    ]
}
- To visualize the result, please go to http://geojson.io and load the result content from there.
Testing using OTB.BandMath
By looking at the demonstration available online and in the OSGeoLiveDVD I think that it would be nice to try using the wps-rest-binding use for getting the same kind of result that we get currently from the demo.
Below is a list of steps with some screenshots showing the result you should get for running Orfeo ToolBox BandMath application using the wps-rest-bind.
- Load the swagger interface from here.
- Search for Execute EndPoint and click on the green line below ("/processes/{id}/jobs").
- Press the "Try it out" button to display the interface to run an Execute request.
- Set: "OTB.BandMath" in the process id field, select "respond-async" option in the select list then, in the "Request body" part, please enter the following content:
{
    "inputs": [
        {
            "id": "il",
            "input": {
                "format": {
                    "mimeType": "image/tiff"
                },
                "value": {
                    "href": "http://geolabs.fr/dl/Landsat8Extract1.tif"
                }
            }
        },
        {
            "id": "exp",
            "input": {
		"dataType": {
		    "name": "string"
		},
                "value": "im1b1/im1b2"
            }
        },
        {
            "id": "out",
            "input": {
		"dataType": {
		    "name": "string"
		},
                "value": "float"
            }
        }
    ],
    "outputs": [
        {
            "id": "out",
            "format": {
                "mimeType": "image/tiff"
            },
            "transmissionMode": "reference"
        }
    ]
}
- Press the "Execute" button down the form, you should see something like in the following.
- You should identify the line showing the Location header returned by the server (providing the jobId created)
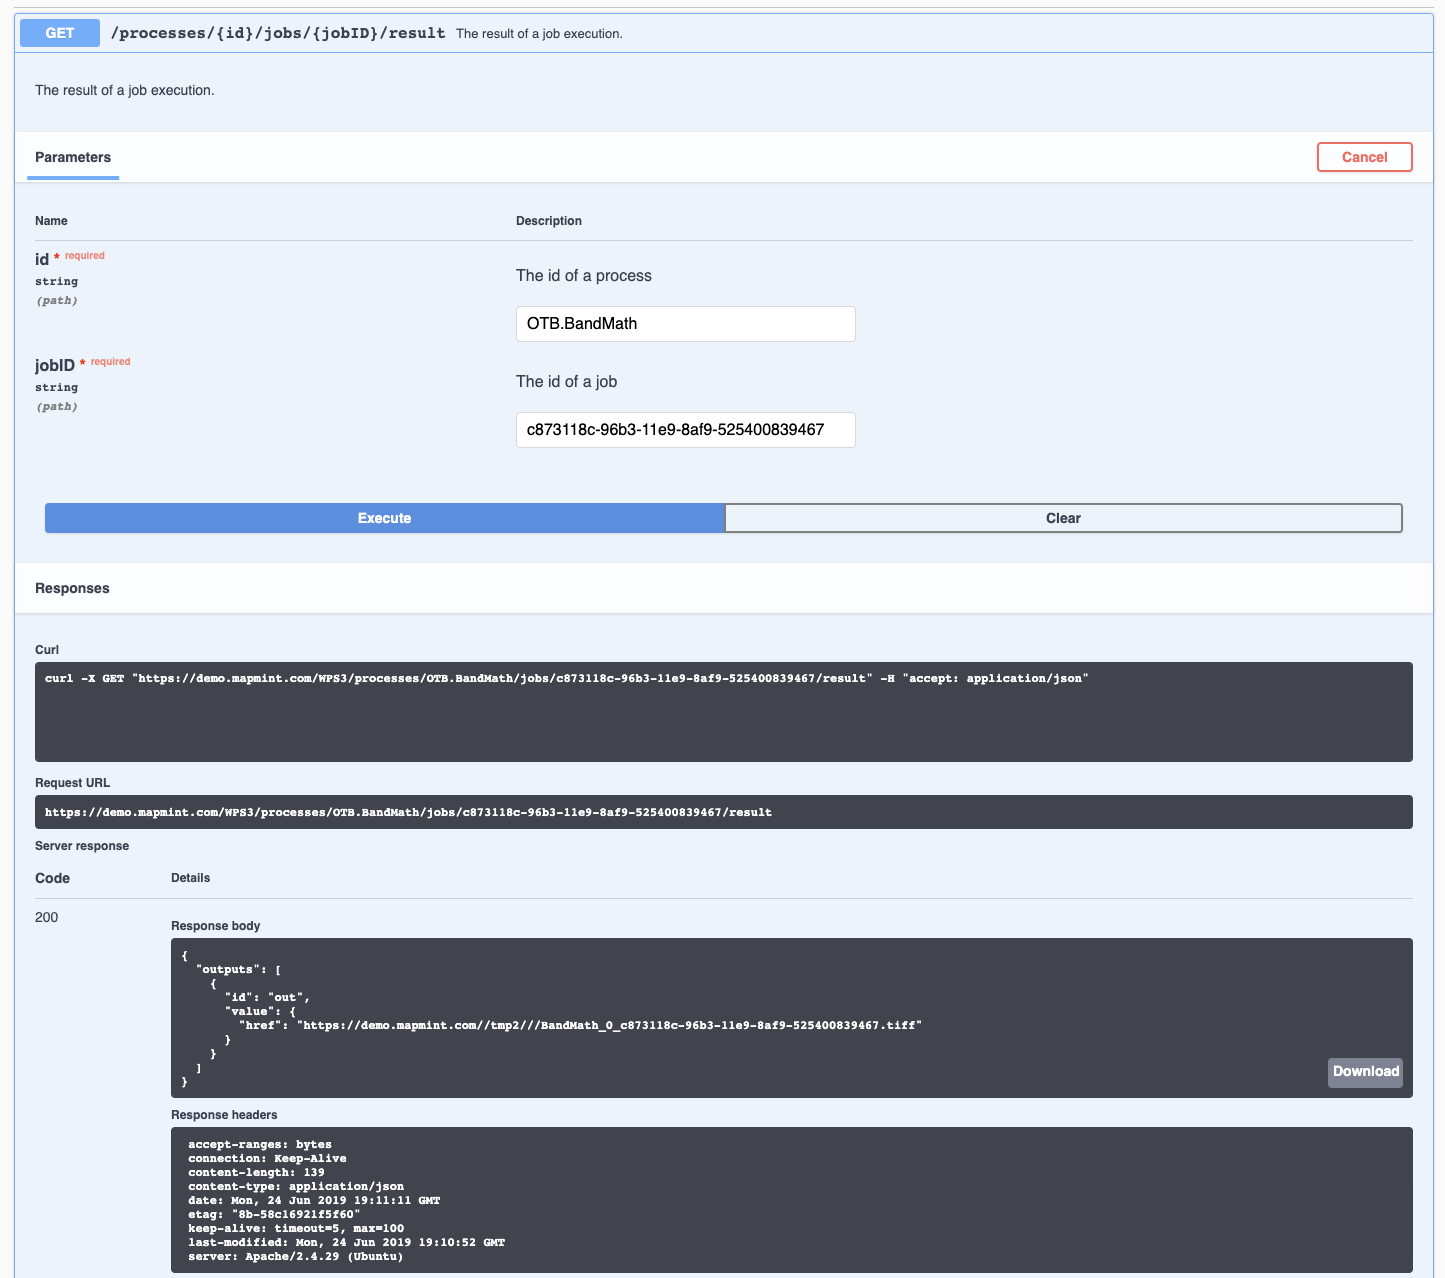
- You can can either go down the "GetStatus" or "GetResult" section to access the status of your running service or the result (set "OTB.BandMath" in the id field and the returned jobId found in the Location header). You can see below an example of "GetResult?" for the execution.
Simple OpenLayers interface
This is a direct output of the hackathon participation, based on the old demo code available from the http://zoo-project.org, I have made this very small demo available where the interactions between the client and the server use the wps-rest-binding definitions with some small adaptations.
Attachments (6)
- Capture d'écran 2019-06-24 16.08.45.png (345.6 KB) - added by djay 6 years ago.
- Capture d'écran 2019-06-24 16.09.08.png (514.7 KB) - added by djay 6 years ago.
- Capture d'écran 2019-06-24 16.26.54.png (435.0 KB) - added by djay 6 years ago.
- Capture d'écran 2019-06-24 16.31.19.png (346.7 KB) - added by djay 6 years ago.
- Capture d'écran 2019-06-24 19.11.46.png (175.4 KB) - added by djay 6 years ago.
- Capture d'écran 2019-06-24 19.11.32.png (163.8 KB) - added by djay 6 years ago.
Download all attachments as: .zip


